Table of Contents:
Introduction: Goals of Stainless Steel Manufacturing Visualization in PPT
Visualizing the stainless steel manufacturing process in a PowerPoint presentation isn’t just about adding pretty pictures or filling slides with technical jargon. The real goal? To make complex industrial workflows accessible, memorable, and actionable for your audience—whether they’re engineers, decision-makers, or students. When you craft a PPT focused on stainless steel production, you’re not just documenting steps; you’re building a bridge between technical detail and visual clarity.
Key objectives for this visualization approach include:
- Clarifying intricate processes: Transforming multi-stage production into digestible, logical sequences that even non-specialists can follow.
- Highlighting critical decision points: Using visuals to spotlight where choices in materials, equipment, or methods impact quality and efficiency.
- Enhancing retention and understanding: Well-designed diagrams and flowcharts help your audience grasp relationships and dependencies that would otherwise get lost in text.
- Supporting data-driven discussion: Integrating charts or icons to illustrate input-output relationships, energy use, or process bottlenecks, so stakeholders can make informed decisions.
- Facilitating training and onboarding: Visual step-by-step guides accelerate learning curves for new team members or students entering the field.
Ultimately, the purpose of a stainless steel manufacturing PPT visualization is to distill complexity into actionable insight—turning a maze of technical steps into a roadmap that informs, persuades, and inspires action.
Structuring Your Stainless Steel Manufacturing Process Presentation
Creating a compelling stainless steel manufacturing process presentation means thinking strategically about structure before you even touch a slide. The right framework guides your audience seamlessly from start to finish, making even the most technical content approachable. Here’s how to lay the groundwork for a PPT that truly delivers:
- Begin with a process overview: Set the stage by outlining the main phases of stainless steel production. A simple roadmap or flow diagram helps viewers anticipate what’s coming next.
- Dedicate a slide to each major stage: For every core step—melting, refining, casting, forming, heat treatment, finishing—use a dedicated slide. This keeps information bite-sized and prevents overload.
- Layer details logically: Within each stage, present inputs, equipment, and key actions in a top-down order. Visual cues like icons or subtle color coding can reinforce the sequence.
- Integrate cross-stage connections: If certain steps depend on earlier choices (for example, alloy selection affecting heat treatment), use arrows or callouts to make these links explicit.
- Reserve space for data and outcomes: At the end of each section, summarize with a quick snapshot—maybe a table or bullet list—showing what’s been achieved and what’s needed for the next step.
- Conclude with real-world context: Wrap up by connecting the process to final applications or quality benchmarks, anchoring technical details in practical relevance.
By organizing your content with intention, you transform a technical walkthrough into a narrative that’s both informative and easy to follow—no more getting lost in the weeds.
Essential Slides: Mapping Out Each Production Step Visually
To capture the stainless steel manufacturing process effectively, your presentation should feature a series of slides that each tackle a specific production stage. Every slide acts as a visual checkpoint, making it easy for viewers to track progress and understand transitions. The secret sauce? Precision and clarity—each step gets its own spotlight, no clutter, no confusion.
- Raw Material Input: Use icons or simple graphics to represent iron, chromium, and other alloying elements entering the process. A schematic layout can highlight material sources and initial quality checks.
- Melting and Alloying: Show the transformation from raw materials to molten steel. Diagrams of furnaces, temperature gauges, and alloy mixing offer a tangible sense of what’s happening behind the scenes.
- Refining and Purification: Illustrate impurity removal and chemical adjustments. Consider a before-and-after visual or a flowchart showing changes in composition.
- Casting: Depict the transition from liquid to solid—whether via continuous casting or molds. Cross-sectional images can clarify how shape and structure are established.
- Forming and Shaping: Highlight rolling, forging, or extrusion with stepwise illustrations. Show how billets or slabs are turned into sheets, rods, or coils.
- Heat Treatment: Represent processes like annealing or quenching. Thermometer icons or color gradients can indicate temperature changes and their effects on the material.
- Surface Finishing: Visualize treatments such as pickling, polishing, or coating. Before-and-after photos or texture samples help communicate the improvements.
- Inspection and Quality Control: Use checklists, magnifying glass icons, or sample reports to show how final products are evaluated before leaving the facility.
By dedicating a clear, visually focused slide to each of these steps, you not only map out the entire journey but also empower your audience to grasp the flow and significance of every phase. It’s about building understanding, one step at a time.
Visual Tools and Icons for Stainless Steel Process Stages
Choosing the right visual tools and icons can make or break your stainless steel manufacturing presentation. Instead of relying on generic symbols, select visuals that reflect the unique character of each process stage. This approach not only streamlines communication but also adds a layer of professionalism and coherence to your slides.
- Custom Process Icons: Develop or source icons tailored to metallurgical steps—think crucibles for melting, gearwheels for forming, or test tubes for chemical analysis. These bespoke visuals help your audience instantly recognize what’s happening at a glance.
- Infographic Elements: Integrate flow arrows, timelines, and segmented diagrams to illustrate sequences and dependencies. Infographics can clarify the direction of material flow or highlight parallel processes without overwhelming viewers with text.
- Interactive Highlights: Use clickable or animated icons (in digital presentations) to reveal additional data or micro-steps within a process. This technique is especially effective for training or stakeholder engagement sessions.
- Color Coding: Assign consistent colors to each stage—perhaps blue for melting, orange for heat treatment, green for finishing. This visual shorthand reinforces the process structure and helps viewers orient themselves quickly.
- Legend and Key: Always include a legend that deciphers your icons and color codes. This small addition prevents confusion and ensures that even newcomers can follow the story from start to finish.
By investing in well-chosen visual tools and icons, you transform your PPT from a static report into a dynamic, intuitive guide through the stainless steel manufacturing process.
Integrating Material Input and Alloy Composition Data
Presenting material input and alloy composition data in your stainless steel manufacturing PPT requires more than just listing elements and percentages. To truly inform and engage, visualize how raw materials and their proportions shape the final product’s properties. This is where data-driven design steps in, turning numbers into actionable insights.
- Material Flow Charts: Use clear, stepwise diagrams to show the journey of each raw input—iron, chromium, nickel, and trace elements—from delivery to furnace. Highlighting sources (primary vs. recycled) can add context and support sustainability discussions.
- Alloy Composition Tables: Present alloy recipes in concise tables, with columns for element, percentage, and function (e.g., “Chromium 18% – corrosion resistance”). This helps viewers connect composition with intended performance.
- Comparative Visuals: Incorporate side-by-side bar graphs or pie charts to compare standard stainless steel grades (such as 304 vs. 316) at a glance. This makes differences in alloying clear, especially for non-specialists.
- Interactive Data Callouts: For digital presentations, add clickable callouts or hover-over notes that explain why certain elements are included or how minor changes impact corrosion resistance, strength, or ductility.
- Traceability Indicators: If relevant, include icons or tags that show how batch tracking and input documentation ensure quality and compliance throughout the process.
By weaving material input and alloy data into your slides with purpose and clarity, you give your audience the tools to understand not just what goes in, but why it matters—and how it all adds up to high-performance stainless steel.
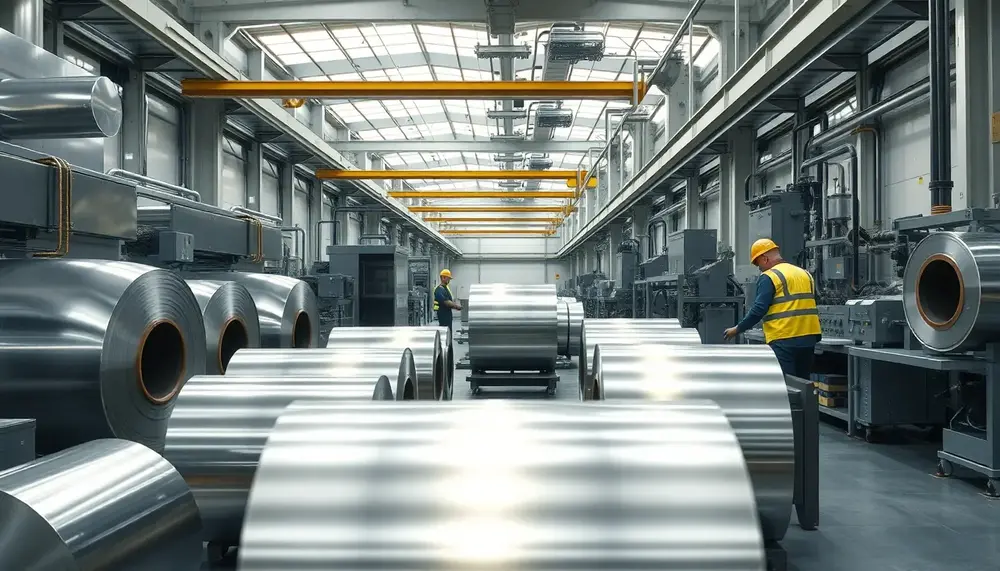
Showcasing Key Equipment and Facility Layouts
Bringing the stainless steel manufacturing environment to life in your presentation means highlighting the essential machinery and how each piece fits into the broader facility layout. This isn’t just about showing big machines—it’s about helping your audience understand the flow, safety, and efficiency built into modern production plants.
- Core Equipment Visualization: Feature high-impact visuals or schematics of the most critical machines—like electric arc furnaces, continuous casting machines, hot and cold rolling mills, and automated surface treatment stations. Label each with its primary function to anchor understanding.
- Facility Flow Mapping: Present a simplified plant layout diagram, tracing the path from raw material intake through to finished product storage. Use directional arrows or subtle shading to clarify movement and spatial relationships between process zones.
- Safety and Automation Highlights: Point out areas where robotics, sensors, or advanced control systems are integrated for quality assurance and worker safety. This not only demonstrates technological advancement but also reassures stakeholders about operational reliability.
- Space Optimization Insights: Briefly note how strategic equipment placement reduces energy consumption, minimizes material handling, and supports streamlined logistics—key for lean manufacturing goals.
By showcasing both the equipment and its layout, you offer a window into the real-world dynamics of stainless steel production—making the process tangible, logical, and easier to grasp for every viewer.
Step-by-Step Visualization: From Raw Materials to Finished Stainless Steel
Capturing the entire stainless steel journey in a step-by-step visual sequence means more than just ticking off process boxes. It’s about making each transformation stage stand out, so your audience can see not only what happens, but also how and why. Let’s break it down into distinct, visually engaging moments that map the path from raw input to high-value product.
- Raw Material Charging: Visualize loaders and conveyors delivering iron, chromium, and alloying elements into the furnace. Emphasize the controlled sequencing and batch weighing for precise chemistry.
- Primary Melting: Show the dramatic arc of electric currents melting the charge. Illustrate temperature profiles and the dynamic mixing that ensures homogeneity.
- Secondary Metallurgy: Highlight ladle refining, where gases and impurities are adjusted. Use visual cues for slag removal and the addition of fine-tuned alloying agents.
- Casting: Depict molten steel flowing into continuous casting machines or molds. Indicate solidification fronts and the formation of slabs, blooms, or billets.
- Hot Forming: Illustrate rolling or forging, with heated steel passing through massive rollers or hammers. Capture the elongation and shaping in real time.
- Controlled Cooling: Show cooling beds or water sprays, focusing on the careful management of temperature gradients to prevent defects.
- Cold Working: Represent further shaping—like cold rolling or drawing—where steel gains its final dimensions and enhanced strength.
- Surface Conditioning: Visualize pickling lines, brushing, or grinding stations that remove scale and perfect the finish.
- Final Inspection and Packaging: End with automated inspection systems and protective packaging, readying the stainless steel for shipment to its next destination.
This stepwise visualization transforms the process into a clear, logical story—each stage building on the last, with every visual element reinforcing the progression from raw to refined.
Detailing Melting, Refining, and Alloying with Diagrams
To communicate the heart of stainless steel production, focus on the melting, refining, and alloying stages with crisp, targeted diagrams. These visuals should do more than decorate—they must decode what’s happening inside the furnace and ladle, making invisible chemical and physical changes tangible for your audience.
- Melting Stage: Use a sectional diagram of an electric arc furnace, labeling electrodes, charge materials, and molten pool. Illustrate the flow of electrical energy and heat distribution, showing how solid feedstock transforms into liquid steel. Annotations can pinpoint where temperature sensors and sampling ports are located for real-time monitoring.
- Refining Operations: Present a cross-section of a ladle or secondary refining vessel. Highlight gas injection points (argon, oxygen), slag layers, and the removal of unwanted elements. Visualize the movement of impurities from steel into slag, perhaps with arrows or color gradients, to make the purification process clear at a glance.
- Alloying Integration: Diagram the addition of alloying elements at precise intervals. Show dosing systems and the dispersion of elements like nickel or molybdenum within the molten steel. A timeline or sequence bar can help indicate when each addition occurs for optimal mixing and property control.
- Process Control Snapshots: Add callouts for key control parameters—temperature, chemical composition, stirring intensity—at each stage. These can be presented as mini-infographics beside the main diagram, reinforcing the role of process monitoring in achieving target steel quality.
By layering these diagrammatic elements, you transform technical complexity into visual logic, making the critical steps of melting, refining, and alloying not just understandable, but almost intuitive for your viewers.
Illustrating Casting Processes and Shape Formation
Effective illustration of casting processes and shape formation in your stainless steel manufacturing PPT means zeroing in on the transformation from liquid metal to precise, usable forms. The right visuals can demystify the complexity of these steps and make the mechanics of solidification and shaping accessible, even to those with limited technical background.
- Continuous Casting Visualization: Depict the flow of molten steel through a water-cooled mold, emphasizing the rapid formation of a solid shell. Show how the strand is withdrawn and supported, with rollers guiding the semi-solid product as it cools and hardens. Use arrows or gradients to indicate temperature changes along the path.
- Shape Formation Techniques: Highlight the transition from cast slabs, blooms, or billets to final geometries. Visuals should differentiate between rolling (for sheets and coils), extrusion (for rods and tubes), and forging (for custom shapes). Each method’s unique deformation path and resulting product profile should be clear at a glance.
- Dimensional Accuracy and Defect Control: Illustrate how sensors and automated controls monitor thickness, width, and surface quality during and after casting. Indicate where adjustments are made in real time to minimize defects like cracks or inclusions, reinforcing the precision of modern shape formation.
- Integration with Downstream Processes: Briefly show how cast and shaped products move seamlessly to subsequent processing steps, using simple connectors or flow lines. This helps the audience understand the continuity of production and the importance of casting as a foundation for quality stainless steel products.
By focusing on these aspects, your presentation will provide a clear, stepwise view of how stainless steel takes shape—bridging the gap between molten metal and the finished forms that drive industry and innovation.
Demonstrating Heat Treatment and Surface Finishing Techniques
Heat treatment and surface finishing are the unsung heroes of stainless steel manufacturing, quietly transforming raw shapes into high-performance, application-ready materials. These steps don’t just tweak the metal—they fundamentally alter its microstructure, surface chemistry, and, ultimately, its value in demanding environments.
- Heat Treatment Nuances: Stainless steel undergoes a variety of thermal cycles, each with a specific goal. Annealing relieves internal stresses and restores ductility after cold working, while solution treatment dissolves unwanted precipitates, ensuring a uniform structure. Quenching and tempering are sometimes used for martensitic grades, dialing in the perfect balance of hardness and toughness.
- Atmosphere Control: Precise control of furnace atmosphere—whether inert, reducing, or oxidizing—prevents unwanted surface reactions and maintains the alloy’s signature corrosion resistance. Nitrogen or argon blanketing is often used to protect the steel during critical heat treatment phases.
- Surface Finishing Techniques: Beyond simple cleaning, surface finishing includes pickling (acid removal of scale), electropolishing (microscopic smoothing and passivation), and mechanical polishing for a mirror-like shine. Each technique is chosen based on the end-use—food-grade surfaces demand different finishes than architectural panels or surgical tools.
- Functional Surface Modifications: Advanced treatments like plasma nitriding or coating can be applied to further boost wear resistance or add antibacterial properties, especially for medical or high-wear industrial components.
- Quality Verification: After finishing, surface roughness, gloss, and chemical passivity are rigorously measured. This ensures not only aesthetic appeal but also the long-term durability and hygiene required in sensitive applications.
By showcasing these heat treatment and finishing techniques, your presentation highlights the crucial final steps that elevate stainless steel from functional to exceptional—ready for the most demanding real-world challenges.
Presenting Quality Control and Final Inspection Stages
Presenting Quality Control and Final Inspection Stages means shining a spotlight on the safeguards that guarantee stainless steel meets exacting standards before it ever leaves the facility. These steps are not just a formality—they’re the backbone of customer trust and regulatory compliance.
- Non-Destructive Testing (NDT): Techniques such as ultrasonic, radiographic, and dye penetrant testing are employed to detect internal flaws or surface cracks without damaging the product. This ensures integrity and reliability, especially for critical applications.
- Dimensional Verification: Automated laser and optical systems precisely measure thickness, width, and length, flagging any deviation from specified tolerances. Consistency here is vital for downstream fabrication and assembly.
- Surface and Microstructure Analysis: Advanced microscopes and surface profilometers are used to assess grain structure, phase distribution, and surface finish. These checks confirm that the desired mechanical and corrosion-resistant properties have been achieved.
- Traceability and Documentation: Each batch is logged with a unique identifier, linking it to detailed production records and test results. This traceability supports recalls, certifications, and customer audits.
- Final Certification: Only after passing all inspections is the stainless steel certified for shipment. Documentation is prepared, including test certificates and compliance declarations, ensuring full transparency for end users.
Incorporating these quality control and inspection stages into your presentation not only demonstrates technical rigor but also reassures your audience that every piece of stainless steel is delivered with proven performance and accountability.
Highlighting Industrial and Medical Applications Visually
Highlighting Industrial and Medical Applications Visually means moving beyond generic examples and instead, spotlighting real-world scenarios where stainless steel’s unique attributes are not just useful—they’re mission-critical. Effective visuals can bridge the gap between technical process and tangible impact, helping your audience instantly connect the dots between manufacturing steps and end-use value.
- Industrial Use Cases: Illustrate stainless steel’s role in chemical reactors, food processing lines, and energy infrastructure. Use cutaway diagrams to show how corrosion resistance and hygiene are essential in environments exposed to harsh chemicals or frequent cleaning cycles.
- Medical Device Integration: Visually map the journey from stainless steel rod or wire to finished surgical instruments, implants, or dental appliances. Emphasize features like biocompatibility and ease of sterilization by overlaying icons or micrographs that highlight these properties.
- Performance Under Stress: Present side-by-side visuals of stainless steel components operating in extreme conditions—high pressure, cryogenic temperatures, or repeated sterilization—contrasted with alternative materials. This underscores why stainless steel is often the only viable choice.
- Regulatory and Safety Visuals: Include infographics that connect stainless steel’s compliance with medical and industrial standards (such as ISO or ASTM) to its widespread adoption in critical applications.
- Lifecycle and Sustainability: Visually trace the recyclability and long service life of stainless steel products, using flow diagrams or timelines to highlight environmental and economic benefits over time.
By using clear, targeted visuals for each application, your presentation will not only inform but also persuade—demonstrating stainless steel’s indispensable role across industries where performance, safety, and longevity are non-negotiable.
Examples of Effective Stainless Steel Manufacturing PPT Slides
Examples of Effective Stainless Steel Manufacturing PPT Slides can serve as a blueprint for presenters aiming to combine technical depth with visual clarity. These slides go beyond simple process mapping—they leverage design, interactivity, and data visualization to engage and inform diverse audiences.
- Animated Process Flow Slide: A dynamic slide where each manufacturing stage appears sequentially as the presenter clicks. This approach allows for focused discussion on each step, reducing cognitive overload and keeping the audience engaged.
- Interactive Alloy Selector: A slide featuring clickable alloy options that reveal pop-up details about their unique properties and recommended applications. This interactive element supports audience-driven exploration and deepens understanding of material selection.
- Comparative Performance Dashboard: A data-rich slide with bar graphs or radar charts comparing corrosion resistance, mechanical strength, and cost across several stainless steel grades. Such a dashboard provides instant visual benchmarks for decision-makers.
- Equipment Hotspot Diagram: A schematic of the production facility with clickable hotspots. Each hotspot brings up a brief summary or image of the equipment in action, giving viewers a virtual tour of the plant layout and machinery.
- Defect Detection Showcase: A slide displaying high-resolution images of typical surface or structural defects, paired with icons indicating the inspection method used for detection. This makes quality assurance tangible and memorable.
- Lifecycle Impact Visualization: A timeline or flow diagram that traces the environmental footprint of stainless steel from raw material sourcing to recycling. Key sustainability metrics are highlighted, supporting discussions on green manufacturing practices.
Incorporating these slide concepts not only elevates the professionalism of your presentation but also ensures your audience walks away with actionable insights and a clear mental map of the stainless steel manufacturing landscape.
Useful Tips for Clarity, Engagement, and Technical Accuracy
Useful Tips for Clarity, Engagement, and Technical Accuracy can make the difference between a forgettable slide deck and a presentation that truly resonates with your audience. Here’s how to elevate your stainless steel manufacturing PPT with practical, often-overlooked strategies:
- Prioritize visual hierarchy: Use font size, color, and spacing intentionally to guide the viewer’s eye from main points to supporting details. Avoid clutter—white space is your friend.
- Anchor data with real-world references: When presenting figures or technical specs, relate them to familiar benchmarks (e.g., “This grade withstands temperatures higher than a kitchen oven”). This contextualizes information and boosts retention.
- Check units and terminology consistency: Stick to one measurement system per slide, and define any specialized terms the first time they appear. Inconsistent units or jargon can quickly erode trust.
- Test slide readability at a distance: Step back from your screen or print slides out. If text or diagrams aren’t legible from several feet away, revise for clarity.
- Use progressive disclosure for complex content: Break down intricate diagrams or processes into bite-sized segments, revealing one part at a time. This keeps the audience focused and reduces overwhelm.
- Validate technical details with subject matter experts: Before finalizing, have an industry specialist review your slides for accuracy and completeness. This step is essential for maintaining credibility.
- Balance emotion and precision: While technical accuracy is non-negotiable, don’t shy away from adding a touch of enthusiasm or real-world impact. This humanizes your message and keeps engagement high.
Conclusion: Delivering an Impactful Stainless Steel Process Presentation
Conclusion: Delivering an Impactful Stainless Steel Process Presentation
To truly stand out, your stainless steel manufacturing presentation should do more than inform—it should inspire confidence and drive action. Achieving this impact requires a blend of technical rigor, audience awareness, and storytelling finesse. Consider these advanced strategies to ensure your message resonates long after the final slide:
- Tailor content to your audience’s priorities: Identify whether your viewers are engineers, managers, or clients, and address their specific concerns—be it process optimization, cost efficiency, or regulatory compliance.
- Integrate forward-looking perspectives: Briefly touch on emerging trends, such as digitalization in process monitoring or sustainable alloy development, to position your presentation at the cutting edge of industry practice.
- Leverage authentic case studies: Whenever possible, reference real-world successes or challenges encountered during stainless steel production. This adds credibility and grounds your insights in lived experience.
- Encourage interaction and feedback: Conclude with a prompt for questions, discussion, or audience reflection. This not only deepens engagement but can also surface valuable perspectives you might have missed.
- Provide actionable next steps: Summarize key takeaways and suggest concrete actions—such as process audits, technology upgrades, or further training—that your audience can pursue immediately.
By weaving these elements into your conclusion, you transform your presentation from a static report into a catalyst for progress—empowering your audience to make informed decisions and embrace innovation in stainless steel manufacturing.
FAQ: Stainless Steel Manufacturing Process Presentation
What are the essential steps to include when visualizing the stainless steel production process in a presentation?
Key steps include raw material charging, melting and alloying, refining, casting, forming (such as rolling or forging), heat treatment, surface finishing, and quality control. Each stage should be presented visually to clarify the flow from raw input to finished product.
What types of visuals are most effective for illustrating the stainless steel manufacturing process in PowerPoint?
Diagrams, process flowcharts, custom icons, stage-specific infographics, facility layouts, and comparative tables are all effective. Using color coding, annotations, and interactive elements can help make complex procedures clear and engaging for your audience.
How can material input and alloy composition be clearly presented in a PPT on stainless steel manufacturing?
Use flow diagrams to show material sourcing and input, and comparative tables or pie charts to present alloy compositions by grade. Annotations should highlight how different inputs and their proportions affect final product properties.
Why is step-by-step visualization important in explaining stainless steel manufacturing?
Breaking down the process into stepwise visuals helps audiences understand transformations at each stage. It clarifies dependencies, illustrates progression, and boosts retention by making the manufacturing workflow tangible, especially for non-experts.
What are common pitfalls to avoid when creating a stainless steel manufacturing process presentation?
Avoid overcrowding slides with too much information or jargon, using inconsistent visuals, neglecting the logical flow between steps, and omitting legends for icons or color codes. Always check technical accuracy and tailor the content to your audience’s needs.


